Showing posts with label Non Vegetarian. Show all posts

Monday, June 16, 2014

In search of excellence......

There is something about being able to make a dish from "scratch"- where no part of the process is outsourced/store bought. In days when Grandma/Mama cooked that was the only way. But today you do have plenty of options(take away, ready to cook, ready to eat) and sometimes all you need to do is open multiple packs, assemble and you are done. You can still personalize the dish by adding some garnish or that extra dollop of cream or the grated cheese that the dish did not call for. Works for many with almost as good if not better results. You still have the satisfaction of having made it at home in your own kitchen.

However when you do cook a dish with just the basic ingredients there is a different kind of high, you ' stay lifted longer'. To me it cues a kind of mastery over the dish, " Yes, I have nailed it". It also allows you to customize the dish- no currants if the family does not like them in meat balls, sugar/spice/salt are all to taste( your family's taste) and of course it is fresher and you stake your claim on the entire dish.

But sometimes a dish can look so elaborate that I feel intimated. It seems simpler to substitute with the ready to cook/eat version. Three years back I had cooked this very dish with store bought  Meat Balls . If you were to read my post you would realize that I was petrified of frying the meat balls( or for that matter cutlets and chops too)- always feared that they would come apart as I was frying them( comes from being clumsy I guess). But in these three years and many new dishes later I am bold and ready for the challenge. I tell myself if I don't get it this time there will always be a next time. I am glad I braved it and with some excellent results. And of course the accolades(now come on I deserve them don't I - it is almost like that giant leap I took when I swam for the first time to the deep end of the pool)


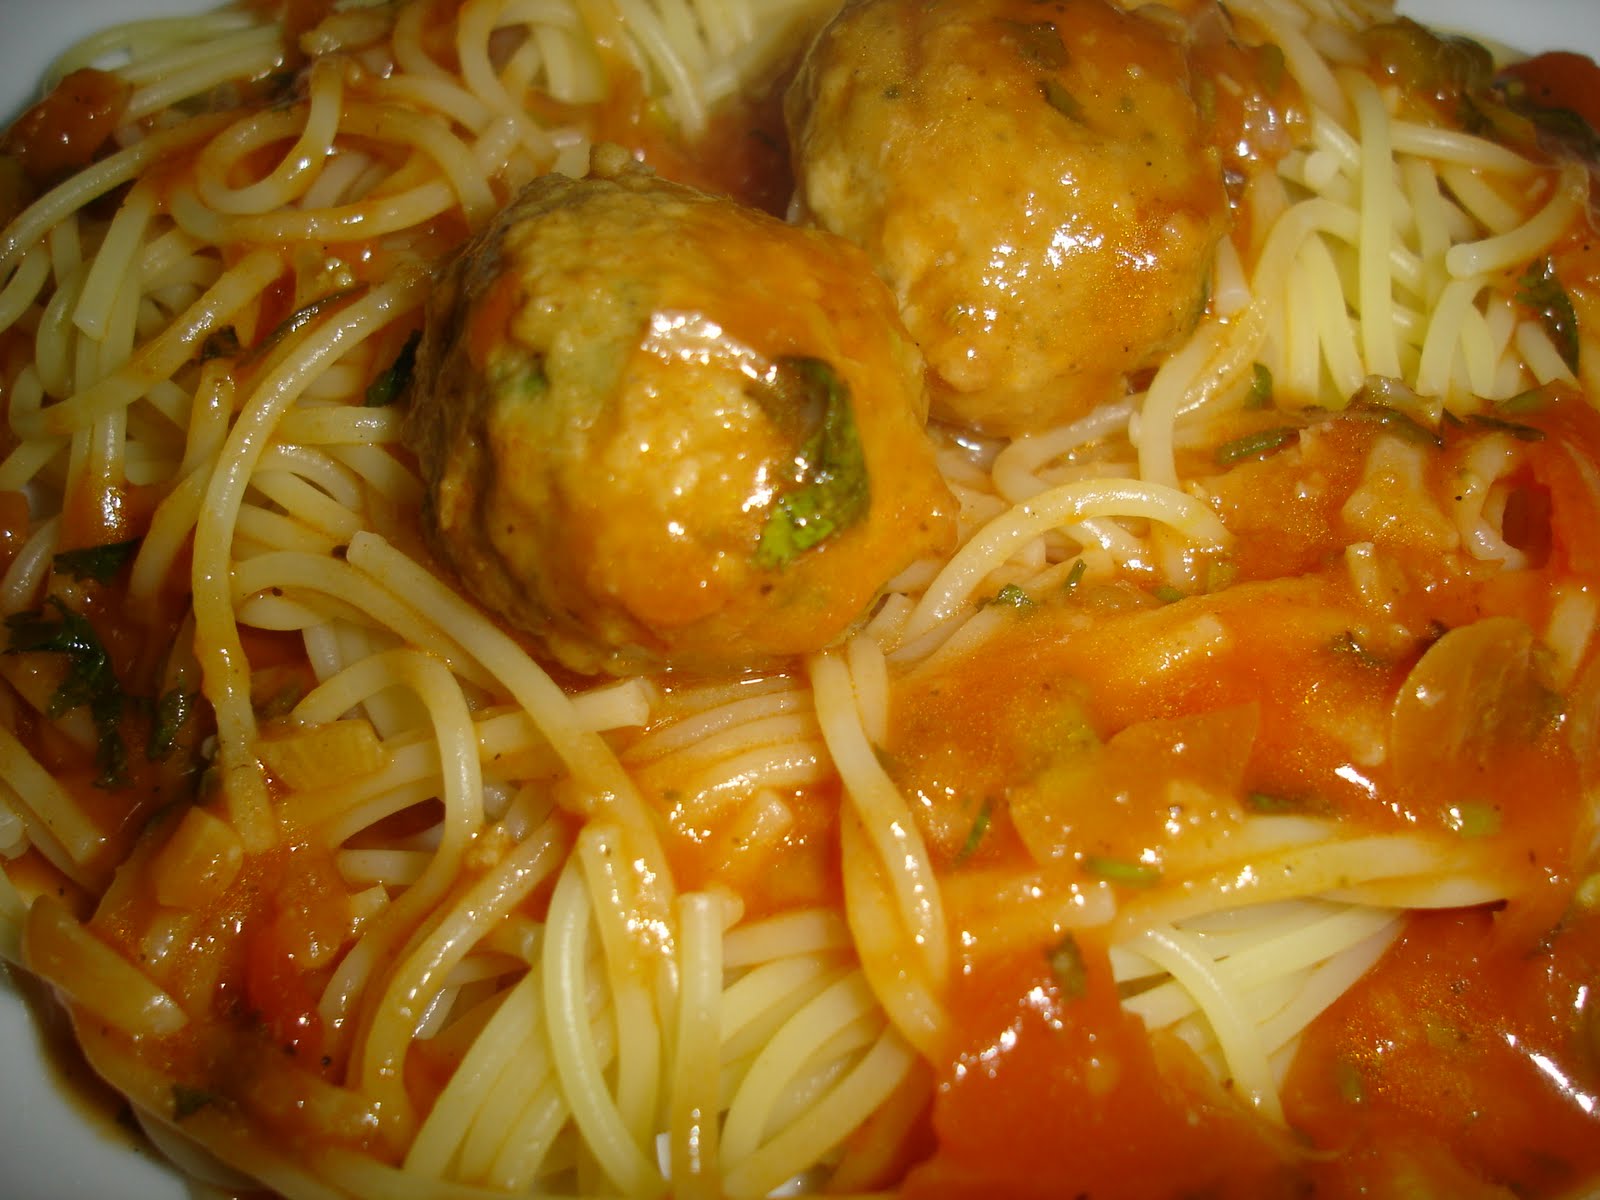
Spaghetti with meat balls 

Ingredients


For the meat balls
Mutton mince: 500 grams
Onions: 2/3 finely chopped( as finely as you can)
Garlic: 4/5 pods, minced
Bread: 4/5 slices( should make about 1.5 cups when cubed)
Milk: 1/4th cup
Thyme: 1 tsp
Salt: to taste( there I go)
Pepper: to taste( yet again)
Eggs: 1/2
Olive oil: 1 tbsp to be added to mince mix
Oil for frying: 5 tbsps

For the tomato sauce
Tomato: 8/10 medium sized ones
Salt to taste
Sugar: 1/2 tsp
Garlic: 2/3 pods minced
Italian seasoning(Oregano): 1 tsp
Red Chilli flakes: 1 tsp (add some more if you would like it spicier)

For the Spaghetti
Spaghetti: 200 grams
Olive oil: 1 tbsp.
Salt

Some finely chopped coriander for the garnish

Method

This looks like a really elaborate recipe with a long list of ingredients but once you start to work you realize that it gets done in quick and easy steps. Boil the pasta- set aside, then tackle the meatballs and alongside the sauce. And one final step of putting it together and then plating it

  • Bring to boil about 12/14 cups of water to which 1 tbsp of olive oil and some salt has been added. Add the pasta and let it cook al dente(or a little kacha). Drain out the water(keep about a cup of the starchy water to add to the sauce), spread the pasta out on a plate and add about a tsp of olive oil to prevent it from drying/sticking. If you think this was the easiest step wait for the day your pasta gets overcooked- can ruin this dish.
  • Next for the meat balls. Trim the sides of the bread and chop them into even sized cubes. Pour the milk over the bread and leave them to soften. This should take about 5/10 minutes. Next add all the mince ball ingredients and mix well to form a dough like consistency. Make little round balls out of them- you should get anywhere between 15/20 balls. Shallow fry the balls in oil turning them from time to time so that all sides get evenly browned. Do this in batches of 5/7 balls each time. Spread the meat balls on a paper towel to drain any excess oil.
  • And finally the sauce. Blanch and puree the tomatoes. Heat the oil and fry the garlic for a couple of minutes till it changes colour, add the pureed tomatoes, sugar, salt and seasoning and let it simmer for 10/15 minutes. Add the pasta water( this gives it a nice, glossy texture), the meat balls and further cook for about 10 minutes.
  • To plate: make a little pasta nest( you can do this very easily with a fork, twirl the pasta around the fork, lift and let it slide onto the plate), a generous helping of the sauce and meat ball over it, sprinkle some finely chopped coriander and maybe if you are feeling very indulgent some grated cheese. The contrast of colours makes this dish look really appetising.
  • Take slow, measured bites and savour each mouthful. Allow your tongue to play a wee bit longer with the succulent, juicy meatballs that have hungrily soaked up the sauce. 
  • And once done pat yourself on the back and say " I did it".
Leftover meat balls make good sandwich filling. They can also be added to traditional Indian curries and gravies. Perfect making meatballs and let your creativity take over.

Bon Apetit and Happy Cooking!

Adios!


Monday, February 3, 2014

Cake tales from near and far...


Yes, I have said this an umpteen times before 'baking is therapeutic'. To mix everything together and watch it take shape- no stirring no tweaking- almost magical. I usually peep several times into the oven to watch the cake rise. It takes a few attempts for you to perfect the temperature setting( each oven being quite unique), and then a butter cake cooks differently from an oil one. Some go 200 degree centigrade with just the lower coil on for 15/20 minutes and then at 150 degrees for the rest of the baking(another 15/20 minutes) with both the coils working together. And then there are others which cook at lower temperatures for much longer- like the eggless chocolate cake I made earlier this evening.

Pre-heating the oven is an absolute must. Sometimes I tend to get a little impatient at this stage. I can't wait for the baking to get started. Do make sure the oven is pre-heating while you finally fold in the flour. That way you don't lose time. Very often it is this stage that decides the fate of your cake.

You enter a house where something is baking and it uplifts the mood. So if serving cake for dessert a good idea would be to start the baking just before the guests start to trickle in. You have to of course be supremely confident that the cake will be a success else have some alternatives handy. When served with vanilla ice cream a badly made cake does manage to pass the muster.

I love trying out different types of cakes. On a personal mission to learn at least twenty different types before end of the year. So if you have any interesting cake recipes please do send them across.

Today's post is about a cake that uses two fairly unusual cake ingredients, and that is what got me interested- black poppy seeds( this is the differentiator) and lemon( the zest into the cake and the juice onto the glaze). The poppy seeds provide an interesting pattern- they look lovely dotting the cake and give it a delightful crunch. The cake is mildly sweet(often referred to as bread and eaten for breakfast) and this contrasts beautifully with the citrusy sweet crust. In all a combination that easily straddles breakfast and tea times.

Lemon Poppy Seed Cake

Ingredients

Lemon- 1 medium sized
Flour/Maida- 1.5 cups
Baking powder- 1 tsp
Eggs- 2
Sugar- 1 cup
Butter- 1 cup(if using unsalted butter do add about 1/2 tsp of salt to balance out the sweetness)
Confectioner's sugar( took me a while to figure out that this was just powdered sugar)- 1/2 cup
Butter- 6 tbsps.
Milk- 1/2 a cup
Black poppy seeds- 1/4th of a cup

Method

1. Mix all the dry ingredients together- flour, baking powder and salt(if using salt).
2. In a large bowl cream butter(leave it out of the refrigerator for a few hours before you start making your cake) and sugar together. This tastes yumm! just by itself. Add the eggs to the mix one after the other and whisk until light and fluffy.
3. Alternate adding milk and the flour mixture till done.
4. Stir in the grated lemon peel and the poppy seeds.
5. Pour the batter into a greased baking dish(for me round ceramic dishes usually work well but for this one try and use a loaf tin).
6. Bake for 15/20 minutes at 200/220 degree centigrade with the lower coil on and for another 20 minutes at 150 degree centigrade with both the upper and lower coils on. Should take anywhere between 40 minutes to an hour to get done.
7. Once done remove the cake onto a plate. Prepare the glaze by mixing the juice of one lemon with the confectioner's sugar. Poke a few holes in the cake and pour the glaze over it. Poking the holes lets the bread absorb the glaze better.
8. Ideally let the cake sit for a few hours for the glaze to be soaked in completely- that is going to be quite a challenge, will test your will power so I suggest you skip step 8. Just cut the cake into large slices and devour.

This recipe has the perfect balance of flavours and a refreshingly summery feel to it. The glaze oozes right down helping keep the cake really soft and moist. There is just one word to describe it- delicious!

Bon Appetit and Happy Baking!


Saturday, September 14, 2013

I have a convert.....

It feels good to be back after a hiatus- over a year. While I have been cooking several new things somehow just did not manage to write about it.

But today I am really excited so much so that I have decided to get back to my blog. In one of my early posts I had mentioned that while my husband was very experimentative when it came to food, had been guinea pig right from my early days of cooking when it came to mutton he only like it the traditional way. Well, now I can proudly say that I have a convert. I cooked mutton differently and he loves it. The trick I think is that new variant( sorry years of FMCG conditioning) adheres to his broad category codes- fiery red color with an oily consistency in the gravy.

I regret scoffing at meat masalas for so many years. Always regarded them as quick fixes that made you hugely compromise on flavor and taste.

I have my friend R to thank in whose house I first sampled this mutton curry. I just loved the taste and discovered two wonder ingredients that she had added to the dish- a meat masala and tomato ketchup. Had I not sampled it for myself I would have never believed her. I have since made this dish umpteen times and it is quite a never fail one. But do make sure you make it in large quantities( I have had about six men polish off two and half kilos of the curry in one meal). Now that I have your attention and interest read on.

Mutton Curry

Ingredients

Mutton- 1 kilo (If making for a family of four I would strongly recommend you make at least a kilo and half . Mutton tastes way better the next day and you will definitely have the family go " anything leftover from yesterday's mutton curry")
Onions: 4/5 medium sized onions finely sliced ( adds to the thickness and texture of the gravy, never mind if the onion prices are soaring, this is one indulgence you must)
Curd: 1/2 a cup
Ginger garlic paste- 2/3 tbsps.
Chilli powder- 1 tsp
Turmeric powder- 1/2 tsp
Sugar: 1/2 tsp
Salt- 2/3 tsps.( or to taste)
Garam Masala- 1 tsp( Freshly pound the green cardamom and cinnamon, bazaar bought garam masalas just doesn't have the flavor. If feeling too lazy to pound use whole cardamom- 2/3 and cinnamon- 1 inch stick)
Tomato ketchup- 1 tbsp. This dish made me realize how undervalued tomato ketchup is- used primarily as a snack accompaniment. Gives the dish its rich red color which can otherwise be achieved with Kashmiri lal mirch
Shaan Meat Masala- 2/3 tbsps. This is the deal clincher and I am glad it is now available quite easily in most supermarkets. So sis doesn't need to carry them all the way from the US of A)
Mustard Oil - 4/5 tbsps.( You could use a sunflower oil if you are repulsed by the smell of mustard oil but the dish gets its characteristic flavors from the mustard oil, I am afraid). I am generous with my oil only when it comes to cooking mutton.
Bay leaf- 1/2
Potatoes- 4 potatoes halved( one per person )

Method

Some very easy steps and dollops of patience. And no that is not a contradiction. It always amazes me that one extra ingredient or a tweak to a step produces something so different.

1. Prepare a marinade of the ginger garlic paste, curd, chilli powder, turmeric powder,
1/4 tsp sugar, garam masala, tomato ketchup and salt. Whisk well together. Add the meat pieces to the marinade and turn them over a couple of times so that the masala coats the pieces evenly. Cover with a cling film(The TV shows have made me believe that this helps retain the moisture and flavor better than a lid. I overlook the part that the cling film maker is one of the chief sponsors of the show). Leave it in the refrigerator for a couple of hours or overnight.
2. Remove the mutton from the refrigerator about half an hour before you start cooking so that it is at room temperature.
3. Heat the kadai/wok. Add the mustard oil to it and let it smoke. Add the remaining 1/4 tsp of sugar.
4. Once the sugar starts to caramelize and turns a brown colour add the sliced onions and stir them around on high flame for a couple of minutes.
5. Next add the mutton, sauté for a few minutes. Add the shaan meat masala, bay leaves and sauté till the oil separates( would take you a good 45 minutes to an hour). Add the potatoes and toss them around with the mutton.
6. Tranfer to a pressure cooker, add water( I always add hot water- cooks faster and I am told helps retain the flavor in some way. When it comes to cooking I just trust my instincts). Cover with the lid and cook for close to 20 minutes( on high till you get the whistle and then on medium heat for the next 15 minutes or so).
7. Allow the cooker to cool down on its own.
8. Serve hot with rice and a salad. That is how my family typically likes it though I feel it goes equally well with chappatis and a raita.

Bon Apetit! And Happy eating!


Thursday, March 8, 2012

MUM- bo Jumbo


Happy Holi!

Love the colors in my dish today, definitely goes with the festive spirit.

Growing up along the coast, we had access to the freshest, juiciest, tastiest prawns. Prawns would appear on the dining table with a certain regularity. Since they were fairly common place we did not go all ooh! and aah! at the sight of them. We just ate them in large quantities.

Mom cooked them in several different ways. There was of course the regular jhol( onion, ginger, garlic gravy), Mustard prawns( the prawns turned out really succulent when cooked this way), then she made prawn cutlets and stuck the tail of the prawn onto them- those looked quite unique. Tons of small sized prawns( read shrimps) got added to Chowmein and Prawn sweet and sour( prawn wantons in a fresh tomato pureed sauce) . I loved her prawns any which way.

One of my favorites was sauted prawns- she usually made this dish when we had larger sized prawns. So when my husband bought some of those prawns home I immediately decided to call Mommy for the recipe. As I was cooking the dish this afternoon the house smelt of my Mom's kitchen- that familiar aroma of prawns being sauted with vegetables and sauces.

Mom's Special Prawns
Serves: 4, Cooking time: 20 minutes

Ingredients

Large prawns( we call them Jumbo prawns): 1 kg
Onions: 4 large onions, quartered
Garlic: 1 tbsp, finely chopped
Capsicum: 1 small capsicum, cubed into 1" pieces
Tomato: 2, remove the seeds and cut into 1" pieces
Green chillies: 4/5, slit on top
Chilli sauce: 1 tsp
Tomato sauce: 1 tsp
Soya sauce: 1 tsp
Corn flour: 1 tsp, dissolved in half a cup of water
Oil: 1/2 tbsp
Sugar:1/2 tsp
Salt: To taste( go easy on the salt because all the sauces have added salt in them)

Method

  • Clean the prawns, leave the head and tail on.
  • Heat the oil in a wok/kadhai.
  • Add the sugar and let it caramalise. Next add the garlic and onions and saute for a few minutes.
  • Add the prawns, cover and cook for about 10 minutes. The prawns should be almost done by this time.
  • Open the lid and add the capsicum, tomatoes, salt, all the sauce and the corn flour. Increase the flame and saute so that the prawn is evenly coated with all the sauces.
  • Turn off the stove and let the prawns rest for a bit. Helps the prawns soak up the sauces. You could also the dish covered.
  • Serve hot with either a fried rice or noodles. We had ours with regular daal and rice.

You could also add some mushrooms and baby corn to this dish. Serve it over a bed of boiled noodles and you have a wholesome meal ready in a jiffy.

The prawns tasted yumm! and as with most of my dishes helped me relive a bit of my childhood.

Bon Apetit and Happy Cooking!


Saturday, March 3, 2012

On a roll...

We are having rolls for dinner tonight. That was a hurried photograph before the plate got whisked away. Once a dish is ready to be eaten my boys just don't have the patience for it to be photographed. So that part continues to be a little rushed.

Rolls always remind me of college. The 'mess' food left a lot to be desired. When food was doled out( we had to queue up for it) I was reminded of the lines from the movie Betaab, "khana hai to yahi khana hai, nahin khana hai to bhi yahi khana hai". Pocket money was fairly limited( yes, from a generation where parents did not believe in over indulging their children- you were sent to hostels so that you grew tougher in every possible way). There used to be a small department store close to our college called Snacko. We used the store to top up on the basics. Then Snacko introduced a roll counter. Going to Snacko was the high point in our lives. An egg roll cost Rs.3/, an egg chicken around Rs.5/ and a special roll(with all of the above) was Rs.8/. Most of us would settle for the egg chicken one as that allowed us to stretch our 'monies' for longer. For birthdays we would go to a small restaurant called "Eats" that served large portions of really delicious Chinese food. It worked out to under Rs.30 a head. Some very fond food memories and friends for life.

We occasionally have rolls for dinner. Typically it is the egg chicken variety. Funny how the same basic ingredients presented a little differently has a completely different response. On an average the boys eat around four rolls each, yes the same boys who struggle to finish two rotis when served with a regular subzi. I sometimes trick them with the vegetarian version.


Egg Chicken Roll

Serves: 4

Ingredients
Roti/paratha dough( Knead the dough just as you would for your rotis, could add a few tablespoons of maida to it)- enough dough to make about 10/12 rolls- roughly about 2 cups should suffice. If there is extra dough carry it over for regular rotis.
Onions: 6/7 sliced fine. My family loves a lot of sliced onion in their roll so I do go a little overboard.
Eggs: 3
Green chillies: 2/3, Chopped fine
Chicken Tikka: 10/12 pieces( you could buy them off the shelf or marinate some boneless chicken in ginger garlic paste, hung curd, garam masala and red chilli paste for a couple of hours. Saute till done and your tikkas are ready)
Oil: About a tsp per roll and 2 tbsp to saute the onions
Tomato ketchup: 2 tbsps
Chilli sauce: 2 tbsp

Method

  • Beat the eggs and keep aside
  • Heat 2 tbsps of oil and lightly saute the onions and green chillies( for about a minute or two)
  • Roll out the paratha, cook it on both sides with about a teaspoon of oil. Once done ladle about a tbsp of the egg mixture on to it and spread it around to cover the roti completely( could also brush the egg on the roti) and let the egg cook. Once the egg starts to resemble an omelet, layer the onions,chicken tikka( could use about 2 tikkas per roll), add a dash of chilli sauce and roll it up.
  • Serve hot.
This tastes best when served immediately but also makes for a good lunch box option. Leftover sauted vegetables work well for the filling. Ideal time to make rolls is the on the day after the big party when you have leftover tikkas and kebabs.

Bon Apetit and Happy Cooking!

Sunday, February 26, 2012

Simmered and Stirred.....with apologies to Mr. Bond

Sunday evening signals that the weekend is almost over. The only way to cheer yourself up is to cook something really special. It is important for me to make the evening meal on Sundays a little different and interesting. Helps tide over Monday morning blues.

This evening I chose to make the handmade Tunnisian Harrisa Fettucine pasta that sister had got me. Apart from being hand made I am not really sure how this pasta is different but what I do know is that it is head and shoulders above any other pasta that I have cooked/eaten. It is also less sticky and stays separate for much longer.

I particularly enjoyed making the meat sauce today. I let the sauce simmer on the flame for over an hour. Was exciting to watch the mince simmer, bubble up and acquire the right consistency. I also kept adding ingredients impromptu- vegetable stock from last nights stew, some red wine that has been sitting in the refrigerator, a piece of cheddar from my husband's snack platter. All of them adding color, taste and richness to the sauce. Unlike other times I used a masher( yes, the same one I use to make Pao bhaji). This gave my sauce a uniform and glossy texture. The kitchen smelt really nice as the mince was simmering. Son claims he could smell it from two flights down. Never mind the exaggeration it all worked well together. And finally plating it so that the pasta and meat sauce could create some magic on our sensorials.


Pasta with meat sauce

Serves :4, Cooking time: 1 hour

Fettucine Pasta: About 100 grams
Garlic: 4/5 pods chopped fine
Onions: 2/3 medium sized onions, chopped fine
Tomatoes: 3/4 medium sized tomatoes blanched and pureed
Tomato ketchup: 1 tbsp( primarily to add color)
Red wine( optional): 1/2 cup
Mutton mince: 500 grams
Vegetable stock: 2/3 cups( else use warm water)
Olive oil: 2/3 tbsps
Oregano seasoning: 1 tbsp
Green corriander: 1 tbsp, finely chopped for the garnish

Method

  • Boil the pasta in plenty of water to which a little salt has been added(to ensure your pasta does not stick, add a tsp of olive oil into the water) for about 8/10 minutes. Drain the water, toss the pasta with 1 tbsp of olive oil and keep aside.
  • Heat some olive oil in a pan. Add the garlic and saute for a few minutes. Next add the onions and fry them till they turn glassy. Add the mince, oregano seasoning, tomato puree, ketchup and saute for a few minutes.
  • Turn the stove to a low flame add the vegetable stock and red wine. Let the mince simmer for about an hour. Alternate between cooking it covered and open. Keep stirring and mashing the mince with a masher from time to time. Add more stock if needed. The meat sauce should have a runny consistency
  • Once the sauce is done add salt to taste.
  • Now to plate. Place the pasta on a plate, shape it like a bird's nest. Spoon about 2/3 tbsp of the meat sauce onto the center. Garnish with finely chopped coriander and serve piping hot. As the pasta would have grown cold it is a good idea to microwave the serving for about 60 seconds and then serve. Add the garnish after you have microwaved.
  • Go ahead slurp it up!
Bon Apetit and Happy Cooking!


Saturday, February 18, 2012

A Pound of Flesh....


This post is dedicated to my Grandpa. He often quoted these famous lines from 'The Merchant of Venice'. That it was mostly in non- food related context and had something to do with his fights with Granny is another story. Like the rest of the family Grandpa loved food and thanks to his travels had sampled different kinds of cuisine very early in his life. His food stories were a delight, he managed to create excitement around everyday dishes. Pish Pash was one such dish- we always thought he had made up the name till years later bro found it on the menu of a Dak Bangla( referring to the times of the Raj) buffet.

Now coming back to the dish, like I had mentioned in my earlier post those loaf tins inspired me to bake with renewed vigour. My success at baking bread made me feel confident to try out other seemingly difficult recipes.

Compared to baking bread this one is a sitter. In terms of impact a perfect 10. I just loved the way this dish looks. While I don't have a picture of the sliced loaf( the boys were busy wolfing it down and unwilling to photograph any further) the tri-color pie- mince, egg yolk and egg white looked amazing. It tasted delicious too.

Meat Loaf
Serves: 4, Preparation time: 10 minutes, Cooking time: 1 hour.

Ingredients

500 grams of Mutton mince
3 onions chopped fine
Breadcrumbs: 1/2 cup or 100 grams
Ginger garlic paste: 1 tsp
Vinegar: 1 tsp
Boiled eggs: 3
Raw egg: 1
Salt to taste
Olive oil- 2 tbsp

Method
  • Heat the oil in a pan and fry the onions till they turn light brown. Sprinkle some salt over them and let them cool.
  • In a bowl mix the mince, raw egg, ginger garlic paste, vinegar, bread crumbs and mix well. Add the onions and mix again.
  • Now take the loaf tin, line it with some oil or butter. Divide the mince mixture into two. In the tin pat one half of the mince mixture to form the bottom layer of the meat loaf. Next shell and place the boiled eggs in a row to form the middle layer. Cover completely with the remaining mince mixture. Shape and compress to get rid of any air gaps.
  • Bake at 200 degrees for close to an hour. Initially with only the bottom coil on and for the last twenty minutes with both the top and bottom coils.
  • Once done let the meat loaf rest for about 15 minutes. Remove from the pan and slice evenly.
  • Take a bow when the accolades begin.
Ideally serve this with a clear soup and some stir fried vegetables.

Bon Apetit and Happy Cooking!


Sunday, November 13, 2011

There is a big green house....Daab Chingri


This dish almost seems like an extension of the riddle one learnt as a child. There is a big green house, inside it there is a big brown house, inside the big brown house there is a big white house and right in the middle there is a pool. The answer is " (Tender) Coconut". Replace the pool with some succulent marinated prawns, bake them for an hour. Voila! your dish is done.

I am super duper excited today. So much so that I have started writing the post even before the verdict is out. Making Daab Chingri(Prawns cooked in tender coconut shell) has been on my wish list for a while now. It looks and sounds so exotic.

With an ingredient list that sounds deceptively similar to of 'mustard prawn' it can't possibly taste very different( vetted by personal experience). However this is one dish where the journey is undoubtedly more enjoyable than the dish itself. There is a lot of excitement around preparing it. Even the staged photo shoot lasts much longer.

The prep work starts with hunting for " Tender coconut". Not as easily available post the scorching summer. Not always available at the neighborhood vegetable shops, typically the push- cart seller carries it. And then you have to get the vendor to scrape the top( this allows the heat in) , make a cut on top and slice a little bit from the bottom to help the tender coconut balance itself( for an extra fee of course). Drink the coconut water- you could save a little to add to the marinade- save the shell for the dish that follows.

Daab Chingri
Ingredients
Tender Coconut: Choose one that will fit into your oven.

Medium Sized Prawns: 1 kg, de-shelled and de-veined

Mustard Paste: 2 tbsp(my family likes the pungent taste of mustard, you could reduce the quantity to 1 tbsp)

Ginger Paste: 1 tbsp

Garlic Paste: 1 tbsp

Grated coconut: 1 small bowl(2/3 tbsp)

Onions: 2/3, sliced fine

Green chillies: 2/3, slit till halfway

Salt: To taste

Turmeric: 1 tsp

Mustard Oil: 2/3 tbsp

Wheat flour dough: To seal the top

Kalonji: For decoration

Method

It is a simple one step dish
  • Mix all the ingredients together. Let them stand for a while
  • Scrape the top of the tender coconut. Cut out the top(retain it as you need it later).
  • Stuff the prawn marinade into the tender coconut, do not pack it tight.
  • Put the lid back, seal with dough to make it airtight. Decorate with some kalonji- contrasts well with the off white dough and adds to the visual appeal.
  • Bake in the oven for close to an hour at 180 degree centigrade
  • Serve hot with steamed rice
The prawns have been baking for close to forty five minutes now. The tender coconut shell has turned dark brown. The dough sealing top has dried up and tightened around the top. Fifteen more minutes to go. Table has been set. Rice is done. So baited breath it is.

Just sampled the dish. Really succulent, juicy prawns with a hint of tender coconut. Went well with the otherwise simple meal of rice and daal. Plan to try a variation where I reduce the quantity of mustard and add some tender coconut to enhance the flavour.

This is one of those dishes when placed in front of guests makes them first gasp and then go Wow!

Bon Apetit and Happy Cooking!

Sunday, August 28, 2011

Tales from the coast....Prawn curry


Most people love prawns unless they are allergic to them. Whether boiled, sauted, grilled, baked, fried, stewed, curried this versatile fish( actually crustacean) tastes good in all forms. The only tip to remember is to never overcook them. Then they get all hard, dry and rubbery. So just toss them in, wait for the color to change and out they go. If adding straight into the gravy, add during the final stages of cooking. Some recipes call for them to be cooked with their shell. While this gets a little messy to eat once you have managed to get beyond the top layer there is some flavorsome, soft flesh beneath.

Being from the coast, prawn were quite popular in our household and cooked with regular frequency. Mom tried several versions too- chilly prawns- stir fry the prawns with some soya, vinegar, bell pepper, chillies, onion, garlic and tomatoes to a succulent finish. Yumm!

And then of course Prawns in a mustard base, prawns in a coconut gravy. Actually prawns lend themselves quite easily to all kinds of cuisine- toss a handful into pasta, fry them with some butter and pepper, cook them with some rice and veggies for a most delicious pulao, add them to your salads for flavor, body and taste. You can do just about anything with prawns.

We cooked a more basic version for lunch today. Quite easy to prepare, just stir together a few basic ingredients and you are done. Delicious.

Prawn Curry
Serves: 6

Ingredients

Prawn: 250 grams, medium sized
Onion: 2, finely chopped
Garlic: 4/5 pods, finely chopped
Ginger: 1 inch, grated
Green cardamom: 3
Cinnamon: 2 inch sticks
Bay leaves: 2
Jeera/cumin seeds: 1 tsp
Tomato: 2, finely chopped
Potato: 2, cubed( ideally the same size as the prawns)
Ghee: 1 tsp
Mustard oil: 2/3 tbsp
Green chillies: 2
Cumin/Jeera powder: 1.5 tsp
Corriander/Dhania powder: 1 tsp
Chilli powder: 1 tsp
Turmeric powder: 1 tsp

Method

  • Heat the oil in a wok/kadai till it starts to smoke.
  • Add the prawns( to which some turmeric and salt has been added), saute for a few minutes. Remember not to overcook them. Remove.
  • Into the same wok add the cumin seeds, bay leaves, onion, garlic and saute for a few minutes. Add cardamom and cinnamon sticks.
  • Add the cubed potatoes and cook.
  • Next, mix the grated ginger and dry spices( cumin, corriander, turmeric and chilli powder) with a little bit of water and add it to the wok. Add the tomatoes and cook till the tomatoes soften.
  • Add some warm water( about a cup or two) and let the gravy come to a boil. Add the prawn and let them cook for about 5/7 minutes or so. Add the slit green chillies. Check the salt and add more if necessary.
  • Finish off with some ghee.
  • Serve hot with plain steamed rice.

A very simple meal that leaves you feeling satiated- that I think is the power of simplicity.

Bon Apetit and Happy Cooking!

Saturday, August 6, 2011

Redifining "ghaas phoos"..

Modern day salads have repositioned "healthy eating". People today opt for salads by choice, for the taste and not because they have been asked to go easy on oil and/or spice.
So much so that a popular women's magazine had a salad supplement with its last issue, as many as 100 salads, many of them modified to suit the Indian palate. There were some interesting options though some I think had been stretched/forced fit to make the number 100.

So from being prepared with basic vegetables like cucumber, tomato, onion( with raddish, carrot and beet root added in the winter months) salads have graduated to getting more exotic with names such as tossed rice salad/lentil salads/pasta salad/carrot and raising salad. We think far more innovatively today when we are making salads. I keep adding ingredients even after I have started making the salad. Chicken in the salad below was an afterthought( in fact a substitute for salami strips that I normally add). I added the bread croutons since I was serving it as a meal, would have skipped it if I was serving the salad as a meal accompaniment. They are so handy when you are entertaining, no last minute bother of heating or frying. Keep the ingredients ready, toss them all together and serve. Served as starters too. Most salads can be prepared way ahead and served chilled. Keep a little bit of the seasoning handy in case all of it gets absorbed.
We had an interesting salad last night for dinner and so I have named it after the day of the week( sorry, been rather uninnovative in naming the dish but just could not think of any other name).

Saturday salad
Time: 20 minutes, serves: 1/2

Ingredients
2 bunches of lettuce
2 cups of boiled veggies(beans, carrots, baby corn)
1/2 cup of sauted mushrooms( use half of the regular pack, quarter and cook in a little bit of olive oil, add some salt and pepper to it)
Cherry tomatoes: a handful, these add a lot of colour to the salad, are convenient to use and have a nice, sweetish taste
Olive oil( for the seasoning): 2 tbsps
Garlic: 6/7 large pods, chopped fine
Bread: 1 slice, toast and then chop into small squares
Chicken(optional): boiled and shredded( I use leftover curry pieces- remove the masala and shred them into thin strips- a good way to re-use leftover chicken)
Dried herbs: 1 tsp( I used Basil but oregano would also go well as a seasoning for the salad)
Lime juice: 1 tbsp( half a lime)

Method


  • Place the lettuce in ice cold water to refresh. Leave it in the water for about thirty minutes, take out, gently squeeze out the water and shred into large pieces( never chop the lettuce)

  • Take a large bowl, place the lettuce in it.

  • Then add the boiled vegetables, sauted mushrooms, cherry tomatoes to it.

  • To make the dressing: Heat the olive oil in a small wok/tadka pan, add the garlic and let it turn brown, remove from the flame and add Lime juice, Basil and some salt. Mix well.

  • Add the dressing to the salad and toss the vegetables lightly.

  • Top with bread croutons and serve immediately.

This is a meal by itself. You could serve also serve it along with a clear soup. Lettuce adds a lot of volume to this salad so the portion size is a little deceptive. The portion shown in the accompanying picture serves one adult only.

As with the corriander pulao, this salad combines some fairly varied ingredients for a really flavorsome bite. Be a little generous with the olive oil else the veggies would taste dry. The burnt garlic gives the salad a distinctive taste and helps spice up an otherwise bland fare. Instead of the croutons you could add a handful of pasta, leftover pasta would be even better.

Another successful one dish meal. Bon Apetit and Happy cooking!

Monday, May 9, 2011

Day- O...a beautiful bunch....a ripe BANANA......


"Stack banana till thee morning come
Daylight come and he wanna go home

Its six foot, seven foot, eight foot bunch
Daylight come and he wanna go home......"

Harry Belafonte, one of Dad's favorite singers. We learnt to hum the songs even before we knew what the lyrics meant. Some of my favorites include Jamican farewell, Come back Liza, Woman is smarter, Angelico...Mamma gonna take you back. Actually almost all of them. These are songs with a soul and tug at your hear strings. Interestingly son seems to love them too. In fact it was he who suggested that since the inspiration for this dish is the "ripe" banana I should title this post after the Harry Belafonte famous number by the same name.

I find myself baking almost every other day. Makes for convenient lunch box and snack options. Store in an airtight container inside the refrigerator and warm for about 30 seconds before serving. So the cake technically can stay for days. That it gets polished off in less than 24 hours is another story.

A friend once told me that ripe bananas lying on the kitchen shelf means it is time to bake a banana cake. In fact most recipes for banana cakes go "medium sized over ripe bananas". And then last week my friend K told me about her to die for " choco banana cake". Sounded interesting, a combination I had not tried before. Managed to get K to part with her recipe. Tasted quite nice. Though I had initially planned on serving it with vanilla ice cream(a dollop of fresh cream would also taste good) the boys seemed to think it tasted quite good on its own. In fact this is one cake they were quite happy to eat straight out of the refrigerator.

Chocolate Banana Cake

Don't let the looong list of ingredients bother you. The cake gets done in two quick steps. Mix all the dry ingredients, keep aside. Separately mix all the wet ingredients and slowly fold in the dry ingredients into it. That simple. But psst! play along when the accolades begin.
Ingredients

Banana: 1 cup mashed banana pulp, so two to three medium sized over ripe bananas.
Eggs: 2
Oil: 1/2 cup
Milk:1/2 cup
Warm water:1 cup(K used buttermilk instead of water, this makes the cake softer)
Maida/Refined wheat flour: 1 3/4th cup
Cocoa powder:3/4 th cup
Sugar: 2 cups( If the banana is sweet you could adjust the quantity of sugar but do remember that this is a really large cake almost twice the size of other cakes)
Salt:1/2 tsp( to balance out the taste)
Baking soda: 1 1/2 tsp
Baking powder: 1 1/2 tsp
Vanilla essence: 1 1/2 tsp

Method

  1. Sieve together all the dry ingredients which includes the flour, sugar, cocoa powder, baking powder, baking soda and salt. Keep aside.
  2. Next whip the eggs with the bananas, add water, milk and oil. Mix well.
  3. Fold in the flour mix little by little, stirring continuously ensuring that there are no lumps. The batter is really thin and the cake takes a little longer to cook. But definitely worth the wait.
  4. Bake at 200 degree centigrades for about an hour. For the first 40 minutes keep only the lower coil turned on and for the last 20 minutes bake with both the upper and lower coils turned on. This gives the cake a nice thin crust on the top and along the sides.
  5. Check if the cake is done by inserting a toothpick. The toothpick should come out clean.
  6. Serve hot
  7. If serving as dessert serve it along with some fresh cream or vanilla ice cream.
  8. Given the rich, dark color of this cake you could also frost the cake with some powdered sugar- creates an interesting contrast.
Bon Apetit and Happy Baking!

Sunday, May 8, 2011

Happy Mother's Day, Mama....

My memory has served me well so far( sis will vouch for it, she says " I may forgive but I never forget"). And if it is got to do with food then you can be sure I will carry the memory to my grave.
My blog posts as you would notice are full of some of my favorite food memories. Each time I start writing a post they come flooding back. I just have to think of a similar dish and I am transported back in time. Let me tell you about the 'wafer coated triangle shaped' chocolate that somebody had gifted us( this was way before Kit Kat and Perk became household names- perks 0f growing up in a "port city")- sis and me were completely taken in by the novelty of form and taste. For once we rationed the portions and ate little by little each day. The other one that I comes immediately to mind( varied from the earlier reference but probably sampled both around the same time) is aunty I's cauliflower dish. Basis the snatches of conversation between her and my Mom on the recipe, I remember it being made with grated cauliflower, ginger, onion and tons of butter. It was her specialty. At her dinner parties I always helped myself to generous portions and studiously avoided Momma's glares.


And then there were my mother's cutlets. She made them with all types of fish. In fact very often with Tuna, a fish that most others we knew turned up their noses to( it is only much later that I learnt that Tuna is from the " shark" family). Mom would first get our household help to fillet the Tuna, then she would saute them with some garlic to get rid of the fishy smell and several complicated steps later they would appear on our dinner table as the most delicious cutlets garnished with some onion rings and lime wedges. She also made cutlets with Bhekti, Rohu and even prawns. On winter evenings we would have them with soup and bread.

Mom was here a couple of weeks back and taught me to make fish cutlets. I was amazed at how simple the steps were. That did not take away from the taste. Mom also made them with very little oil which I guess makes them healthy.

We now have cutlets as regulars in our menu. They are convenient as starters, go well as meal accompaniments, are often eaten as evening snacks by the boys, leftover get converted into sandwich/burger filling.


Fish Cutlets


Ingredients( This dish needs very few ingredients and all of it very easily available at home)

Fish: 3/4 pieces( Choose the stomach portions as these would have fewer bones, if buying a fillet about 200 grams should do. If you are planning to make cutlets I would suggest you keep a few " stomach/peti" pieces aside when sorting and freezing the fish)
Onions: 2 medium sizes ones, chopped really fine.
Ginger: 1", finely chopped
Potatoes: 2/3 boiled
Bread crumbs: 2/3 tbsps, enough to coat the cutlets
Mint/Pudina leaves: a handful, finely chopped
Green corriander: 2 tbsps, finely chopped
Oil: About 2 tbsps for a batch of about 20 cutlets
Turmeric: 1tsp
Salt: To taste

Method


  1. Smear salt and turmeric on the fish pieces and shallow fry them.

  2. Debone the fish.

  3. Heat about 2 tsps of oil. Fry the onion till glassy, add the ginger and saute for a few more minutes. Next add the fish and cook together for about 5 minutes.

  4. Remove from fire, add boiled potatoes, 2/3 tbsps of bread crumbs, some finely chopped green chillies( optional), the mint and corriander leaves and mix well.

  5. Make small round balls with the mixture and flatten lightly between your palms.

  6. Spread the remaining bread crumbs on a plate and place the cutlets over them. Turn the cutlets around so that the crumbs coat them evenly.

  7. Heat a tsp of oil in a non-stick, shallow pan. Once the oil heats up, add the cutlets one by one. Arrange them on the pan and fry on both sides.

  8. Serve hot garnished with some onion rings, lemon wedges and a chutney/dip.

Thank you Mama for this wonderful recipe, helps me relive a part of my childhood with each bite.

Bon Apetit and Happy Cooking!

Saturday, April 16, 2011

Dum Maro Dum......


He! He! Sorry about the really cheesy title, could not think of a better one to go with "Dum".

This story goes a long way back, 17 years to be precise. My sister gifted me a rice cooker for my wedding(sis, the same one is still going strong- thank you). The rice cooker( my savior) came along with an instruction manual and a cookbook. Come to think of it that was my first cookbook and only cookbook for a long time. It had an interesting Biryani recipe which I managed to perfect after a few attempts. I loved making Biryani, the Khila Khila Basmati, the kesar flavoring and colour, the aroma of whole spices, the subtle combination of ingredients- only a hint of this and a whiff of that. But above all what I liked best about making Biryani was that post the initial preparatory work the Biryani cooked on its own. Left me free to clear up, get the starters ready etc. etc. Being a one dish meal it also ensured that there were fewer dirty dishes at the end of the meal.

Somewhere along the line I stopped making Biryani. A lot of us stopped eating rice especially at night(typically guests came for dinner), oil/ghee gave way to no oil/low oil cooking. It is still a convenient option and I order in when we have a large number of guests.

About a week back I watched Biryani being prepared on one of the cookery shows. It rekindled my interest in the once popular family dish. I made it yesterday and served it with a basic raita. The men loved it and wolfed almost all of it down. Older one wanted the little bit that was leftover for breakfast today. Me happy.

Looks like Biryani has managed a successful re-entry into the household even if that means 10 extra laps in the pool or 5 more surya namaskars. Given the overwhelming response I think the dish is here to stay and before long I will have the boys asking for it to be made again.

Dum Murgh Ki Kachi Biryani

Ingredients

Biryani though really simple to prepare needs a long list of ingredients and tons of patience. If you are looking for a quick fix try making a pulao and add some Biryani masala to it.

Basmati rice: 2 cups, choose from the premium range to get really long grained rice. I tried Arise, Saffold Gold- nice, long grained khila khila rice just as the ad promised.
Chicken: 1.5 kg, ask your butcher to cut into large pieces, about 6/8 pieces from a kilo
Onions: 6 medium sized ones, sliced fine
Turmeric powder: 1 tsp
Chilli powder: 1 tsp
Garam Masala powder: Roast some green cardamom, black cardamom, cinnamon, cumin, clove and grind to a coarse powder. If you were me you would just add some Roopak Biryani Masala, really good.
Whole spices: Cloves, cinnamon, green cardamom
Lime juice: 1 to 2 tbsp( so about half a lime)
Saffron: a few strands( now this is an expensive ingredient but a key to getting the flavor right)
Milk: 1 cup
Curd: 1.5 cups( If using home made curd, strain the water out using a muslin cloth)
Ghee: 2 tbsps
Oil: 2 tbsps
Ginger garlic paste: 2tbsps
Green corriander: 2 tbsps, chopped fine
Green chillies: 2 tbsps, chopped fine

Method

The preparation needs to begin a couple of hours before.

Start by preparing the marinade. To the curd add the ginger garlic paste, turmeric powder, chilli powder, garam masala powder, salt.

Add the chicken pieces to the marinade and mix really well. Use your hands as the marinade needs to coat all the individual chicken pieces . Let the chicken rest in the refrigerator for a few hours. I would suggest you leave it there for at least four hours.

When ready to start making the Biryani heat the oil in a pan and fry the sliced onions till they turn a dark brown. Chop them fine and add half of the fried onions to the marinated chicken. Leave it for about 30 minutes.

Cook the rice with the whole spices. Drain out the water once the rice is half cooked. Keep aside.

Heat the ghee in a deep bottomed flat pan, add the chicken and cook till the chicken is half done. Arrange into a layer. Sprinkle some finely chopped corriander and some green chillies over it.

Add the rice over it to form a second layer.

Dissolve the saffron strands in some warm milk and spoon over the rice.

Squeeze some lime juice over the rice.

Garnish with the remaining fried onions.

Cover the pan and seal with some atta dough or aluminium foil. Helps retain the flavors and keeps the chicken pieces succulent.

Let the Biryani cook for about 45 minutes on low flame.

Once done open the lid and let the flavors do the talking.

Serve hot with a raita.

Thank the Mughals and savor every bite.

Bon Apetit and Happy Cooking!


Friday, March 4, 2011

TGIF........


My evening today reminds me of the song " Jaate the Japan, pahunch gaye Cheen"(Planned something and ended up with something quite different).

I had planned on making a Cous Cous Chicken. Cous Cous, the new wonder food is doing the rounds. I had come across an interesting recipe for Cous Cous Chicken in a women's magazine. It was new, different, easy to prepare, healthy, a one dish meal and thus perfect for a Friday night dinner. A night when you begin celebrating the two day holiday ahead, want to have something special and yet are not looking at anything fussy or elaborate( those are for Sunday mornings or Saturday evenings). By the time you get back home on Friday, you are physically exhausted, mentally tired and just want to put your feet up. Maybe if you are a foodie, yoCheck Spellingu will make it to the kitchen and rustle up something in a jiffy.
I got late at work and could not pick up the Cous Cous. It is unfortunately not available with the neighborhood grocer. I got back home and decided to make a Fiesta chicken instead only to discover that I did not have raisins, a key ingredient in the dish. Finally after much deliberation and inventory search settled for a Mediterranean version. In this easy dish versatile chicken mingles with the flavors of white wine, herbs and garlic. Calls for ingredients that one usually has on hand.

Mediterranean Chicken( Serves four)

Chicken: 500 grams
Tomato puree: 6 tbsps
Wine: 1/4th cup( I used white wine)
Bay leaves: 2/3
Mixed Herbs: 1 tsp( I had run out of Basil so used some Rosemary and Thyme)
Garlic: 3/4 pods, crushed
Chilli powder: 1 tsp
Sugar: 1 tsp
Salt: To taste
Cornflour/Maida: 1 tsp
Olive oil: 1 tsp( Optional if using a non-stick pan)
Spaghetti: 200 grams( boiled in salt water to which olive oil has been added and drained)

Method

Heat a non stick pan. Add the chicken and cook till it changes colour. This should take a couple of minutes.

Add tomatoes and all the seasoning.

Cover and simmer for about 10 minutes or until the chicken is tender( add a little water if necessary).

Dissolve 1 tbsp of maida in a cup of water and add to the chicken.

Boil well and serve over spaghetti.

The sauce tastes delicious and has a glossy texture. Can also be an accompaniment for Pulaos and Fried rice.

Bon Apetit and Happy Cooking!


Sunday, February 20, 2011

Cloudy with a chance of meatballs......


Something really strange(almost spooky) happened. I cooked Spaghetti with meat balls and the weather turned from a clear sunny day to a cloudy one. It is starting to rain as I write this post. Looks like the weather God either read my mind or peeped into my kitchen. The boys are thrilled with the title of the post and it does seem apt given the turn of events, I mean the change of weather. Rains at this time of the year also means that Winter would stretch for at least another week or two. So more soups, stews in the weeks to follow.

I have been meaning to cook the 'Spaghetti meatballs' combo for a while now. The name has an exotic ring to it. In hindsight the dish is surprisingly simple. Most things in hindsight look simple, don't they?

I am not good with making cutlets, chops, tikkis and the likes. Have a mental block, I fear that they will come apart as I am frying them. Must be to do with some initial disastrous attempts though I cannot recall any such incident at the moment. Not being able to make them is such a shame given that my Mom made Fish and prawn cutlets quite regularly during my growing up years. When we had guests over she even dressed up each prawn cutlets with its little tail which helped enhance the visual appeal and made the cutlets look really appetizing. It is of course obvious that they tasted really good. Oohs! Aahs! and they would be over in a jiffy. Someday soon I hope I can achieve a similar feat. Till then I shall rely on my household help or just buy them off the shelf.

I bought some meatballs while picking up my weekly non-veg from a store close to home. And the first dish that I could think of was spaghetti with meat balls. My first attempt at making this dish and a recipe that I have intuitively put together. I have deliberately skipped the cheese.

Spaghetti with Meat Balls(Serves 4)

Ingredients
Tomato Puree: 1 cup(Add one or two fresh blanched and pureed tomatoes to packaged puree. Makes it convenient and gives the sauce the right color, body and taste)
Meat balls: 10/15( I used store bought ones but you could go through the process of spicing up chicken mince, making them into little balls and then deep frying them)
Oregano seasoning: 2 tsp
Green Coriander: 2/3 tbsp
Onion: 1 medium sized one, finely chopped
Vegetable stock: 2/3 tbsp(I used some leftover vegetable stew)
Garlic: 4/5 large pods, finely chopped
Olive oil: 1/2 tsp
Sugar: 1/2 tsp( to balance out the sour tomato taste)
Spaghetti: 100 grams

Method

For the Spaghetti

Boil about 100 grams of spaghetti in plenty of water. Add some olive oil and salt to the water. Olive oil would prevent the spaghetti from sticking.

Strain and keep aside. Add 1 tsp of olive oil to the spaghetti and toss it well, that way it would not dry up.

Ideally boil the spaghetti when you start to simmer the meatballs in the sauce.

For the meatballs

Put a flat bottomed pan on the stove. Heat some olive oil in it.

Then saute the garlic followed by the onion.

Add the tomato puree, sugar, oregano seasoning, chopped coriander and cook for a few minutes. The puree will begin to thicken.

Add the vegetable stock. This would give the sauce a lovely texture and also add to the taste. As I was using some leftover vegetable stew I also mashed up a few boiled carrots into the sauce.

Next add the meat balls to the gravy. Cover and cook so that the meatball soak some of the gravy.

Putting it all together, Plating it as my older son would say

Place some spaghetti on the plate, shape it like a bird's nest. Pour the meat balls with the gravy into the hollow in the middle. Garnish with some fresh coriander and serve hot. Approximately three meat balls per serve.

Cut the meatballs into little pieces. Twirl the spaghetti around your fork, lift a little piece of the meat ball, pop into your mouth and feel the fusion of flavors/taste as you bite into them together.

Surprisingly easy if you are not starting from scratch. Ready puree and meatballs make it a quick fix. Perfect on a cold, wet, winter night.

Bon Apetit and Happy Cooking!


Tuesday, February 1, 2011

Sunday ho ya Monday, Roz khao Ande.......


Two consecutive egg posts and hence the title. Else if you are on the wrong side of 30 you can have eggs just about once a week(Sunday ke Sunday) or so the Doctors say.

The title of this post has been suggested by my older one. I need to balance things out at home. After all he too would hopefully read the food diaries and all mentions about him are bound to "thrill". When it is to do with food, I am an optimist.

Another post about the ubiquitous sandwich . Remember it is one of my favorite food things. Typically for sandwiches almost anything can work as a good stuffing from last night's leftover curry to mutton cutlets.

But if it is an egg sandwich it had preferably be with boiled eggs. As Vir Sanghvi says, "For an egg sandwich to take a character of its own you need to use boiled eggs". Going by today's response(carried in my lunch box) I would agree with him. Sanghvi goes on to say that the boiled egg was rediscovered during the recession of 2008-2009. I would tend to think eggs never really went out of fashion even in upper middle class households. One restricted consumption purely for reasons of health.

Boiled egg sandwiches qualify as comfort food. Unpretentious in character and simple in terms of taste. They too bring back nostalgic childhood memories.

Boiled Egg Sandwich

Ingredients
Boiled eggs: 4( one egg should suffice for about four slices of bread). If you store your eggs in the refrigerator take them about half one hour before you need to boil them. Boil them in plenty of water to which some salt has been added, this prevents the eggs from cracking while boiling. And you thought it was really easy to make an egg sandwich eh!
Milk: 3/4 tbsps( roughly one tbsp per egg)
Tomato: 1, finely chopped
Fresh Green Coriander/Dhania Patta: Finely chopped
Salt: 1 tsp
Pepper: 2 tsp, freshly ground for that extra flavor enhancement
Mayonnaise: 2/3 tbsps

Method

Boil the eggs and shell them.

Use a spoon to crush them coarsely so that the whites and the yolks mix well. Add the milk at this stage. Adding the milk( picked this tip from my friend S, yes the same one in whose house I had first sampled Khao Suey) keeps the sandwich soft and prevents the egg from drying even hours later. Bet you didn't know that.

Next add the chopped tomatoes and dhania patta( this was a last minute improvisation, there was some tomatoes and dhania patta leftover from the scrambled eggs made earlier).

Take two slices of brown bread. Apply some mayonnaise on the slices. Place the egg mixture on one of the slices, cover with the second slice. Wrap in an aluminium foil/butter paper and pack in your lunch box. You also have the option to eat immediately.

Cold sandwiches are convenient as ' to go' food.

Bon Apetit and Happy Cooking!